Sourdough English Muffins

Sourdough English Muffins are surprisingly easy to make and soooo much better than store bought. The active starter in the dough makes the flavor and texture extra special. The recipe takes several hours, but there is very little hands-on time. Stock up the freezer for future breakfasts.

If you’ve got a sourdough starter you know that, unless you bake almost every day, it’s a bit of a dance to keep the starter active. This is a great recipe for using your starter between baking sessions.
If you don’t already have one, I can show you how to make a sourdough starter and how to feed a sourdough starter.
English Muffins are always toasted before eating. So even when you don’t need more fresh bread, use your starter to make Sourdough English Muffins for a later date. This is a perfect “make ahead and freeze” recipe.

Tips for making and storing Sourdough English Muffins:
- Make sure your starter is active before mixing the dough. If your starter is not active, refresh the starter with flour and water. Wait until a dollop of starter has enough bubbles that it floats when dropped in a cup of water.
- The 30 minute rest at the beginning of the recipe gives the gluten formation a head start. Don’t skip this step.
- The fermentation and rising time will vary based on the ambient temperature of the room and the temperature of your dough. The times listed in the recipe are a guideline.
- The dough needs to ferment at least 3 hours for the best texture. If you want to break up the recipe between 2 days you can refrigerate the dough after the 3 hour fermentation and continue with cutting and rising the muffins the next day.
- Another way to break up the recipe into two days is to wrap the pan of muffins and refrigerate before they rise. Chill the muffins overnight then rise and “bake” the next day.
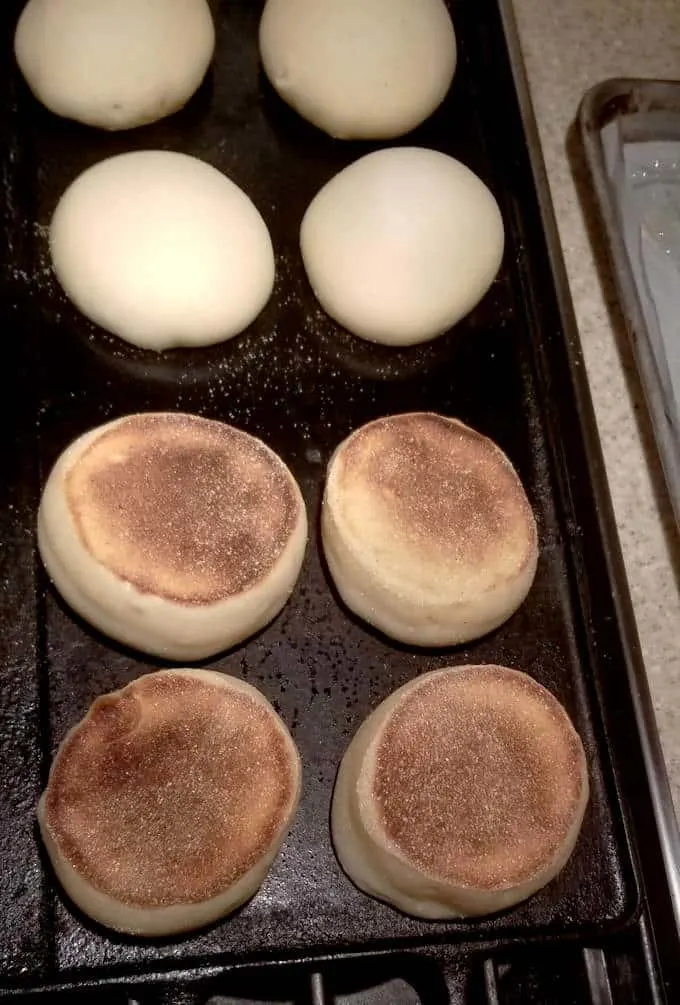
- During the final rise the muffins will tend to spread out more than up. They’ll spring up and gain quite a bit of height as they “bake”.
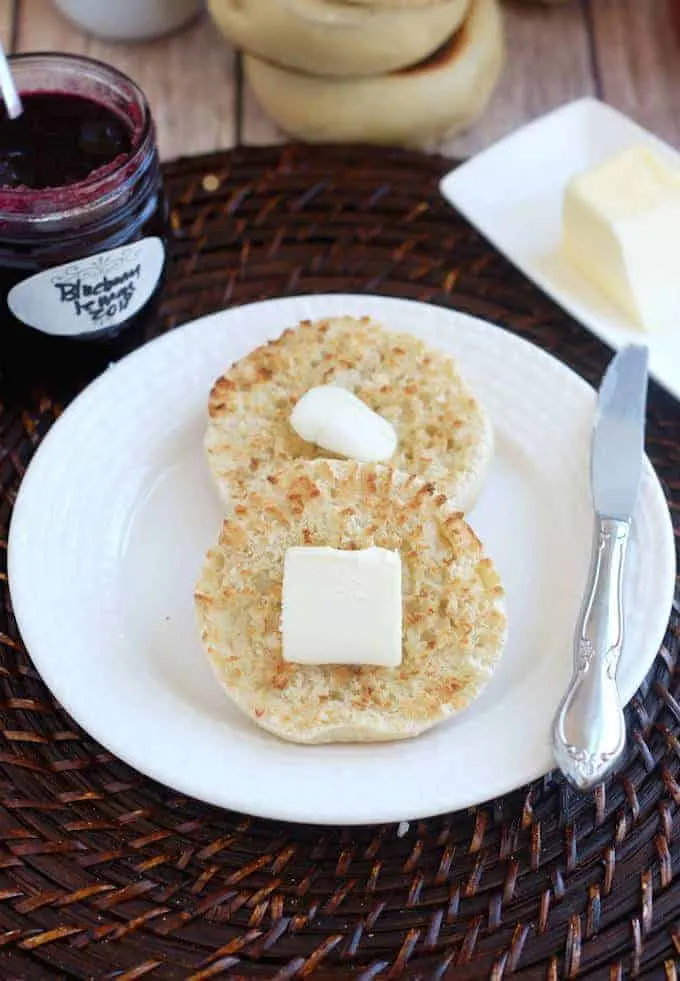
- Sourdough English Muffins should always be toasted before serving.
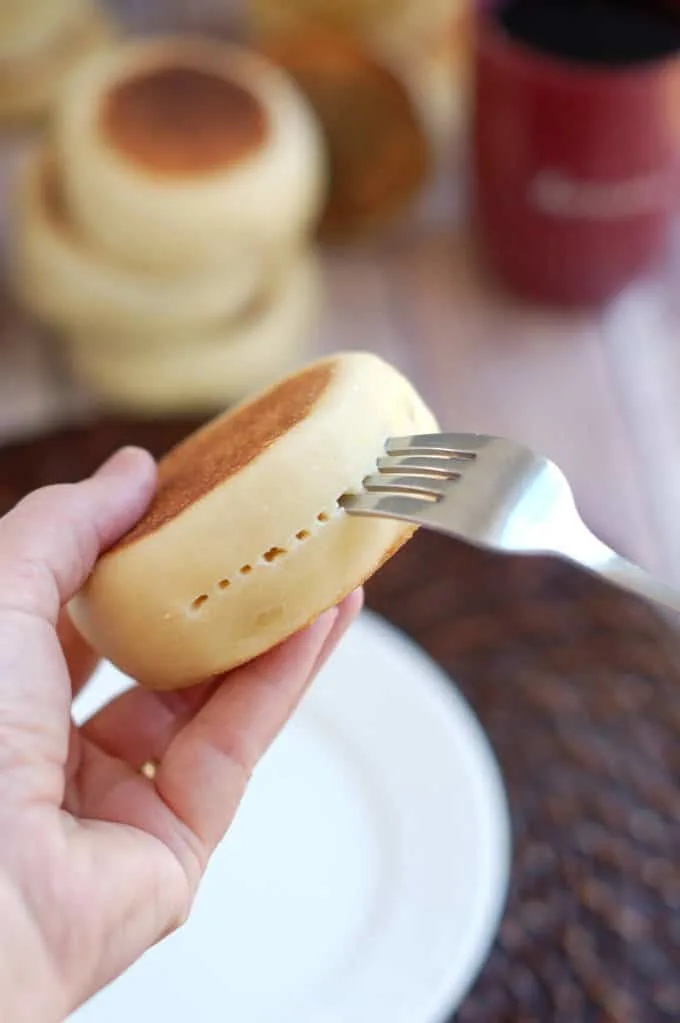
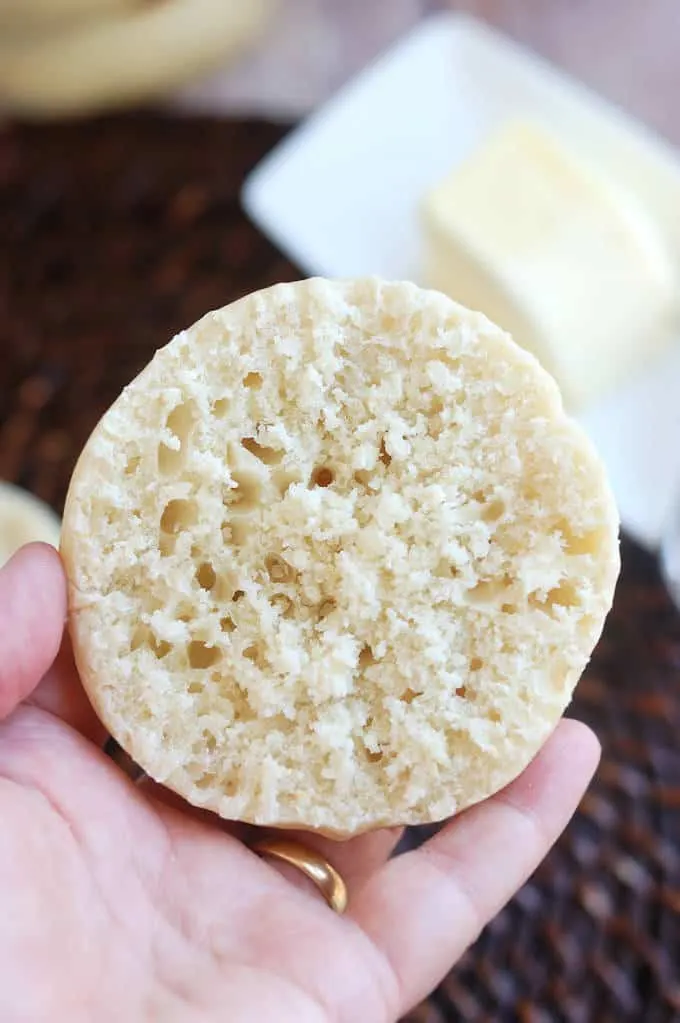
- To get the best texture, use a fork to split the muffin. Don’t slice it with a knife! Fork-splitting forms “nooks and crannies” that sop up lots of melted butter.
- Fresh Sourdough Muffins will keep at room temperature for one day. For longer storage, pack the muffins into freezer bags and freeze up to 3 months.
- Microwave a frozen muffin for 10 to 20 seconds. Fork split the muffin, toast and serve.
Scroll through the process photos to see how to make Sourdough English Muffins:


I know you hate to throw away that sourdough discard. Check out these recipes that use sourdough discard.
If you love this recipe as much as I do, please leave a 5-star review.

Sourdough English Muffin Recipe
Ingredients
- 8 oz active sourdough starter (1 cup, 100% hydration)
- 6 oz warm water (¾ cup)
- 8 oz whole milk (1 cup, warmed to 110 °F)
- 25 oz unbleached all-purpose flour (5 cups, see note)
- 3 oz honey (¼ cup)
- 2 oz vegetable oil (¼ cup)
- 2 teaspoons salt
- cornmeal
Instructions
- Combine 8 oz active sourdough starter, 6 oz warm water 8 oz whole milk and 2 cups of the flour in the bowl of a stand mixer or a large mixing bowl. Mix on low speed until combined. Cover the bowl and set aside for 30 minutes.
- Add 3 oz honey, 2 oz vegetable oil and 2 teaspoons salt and mix to combine. Switch to the dough hook if using a stand mixer. Add the remaining flour and knead until the dough clears the sides of the bowl and clings to the hook. Knead the dough for 2-3 minutes. If mixing by hand, add flour until you can no longer stir, then turn the dough out onto a floured surface to finish by hand.
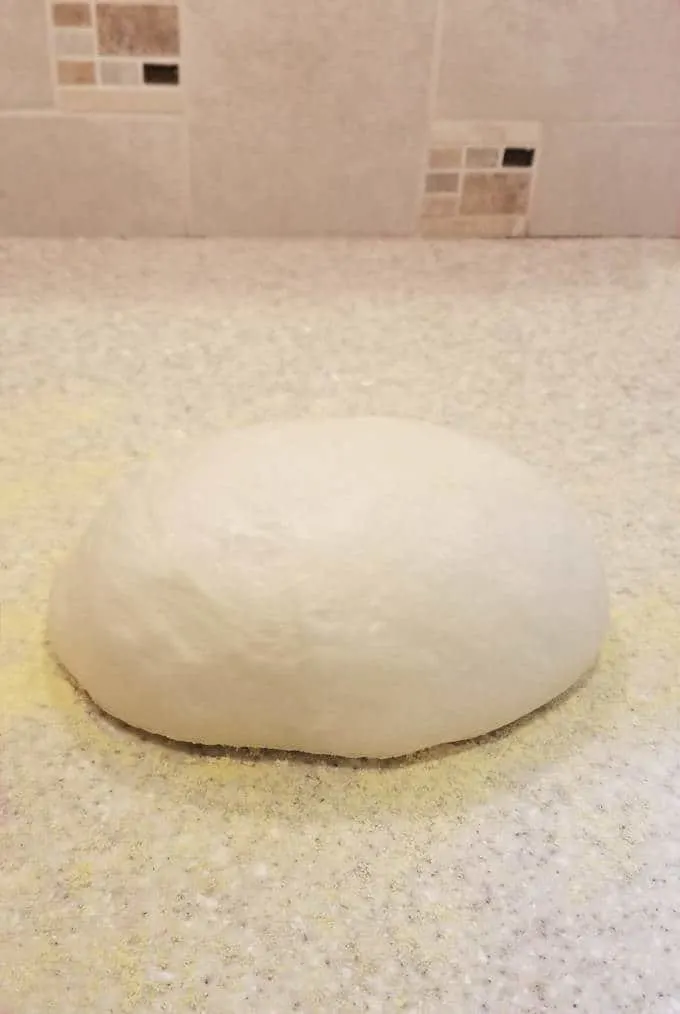
- Transfer the dough to a lightly oiled bow, turning once to coat the dough. Cover the bowl and set it aside at room temperature. After 60 minutes uncover the bowl, lift one side of the dough over into the middle of the dough. Repeat with the other three sides of the dough then flip the dough over. Cover the bowl and after 60 minutes repeat the procedure. Cover the bowl and after 60 minutes repeat the procedure one last time. By now the dough should be lively, elastic and airy. If the dough is still sluggish give it another hour or two at room temperature.
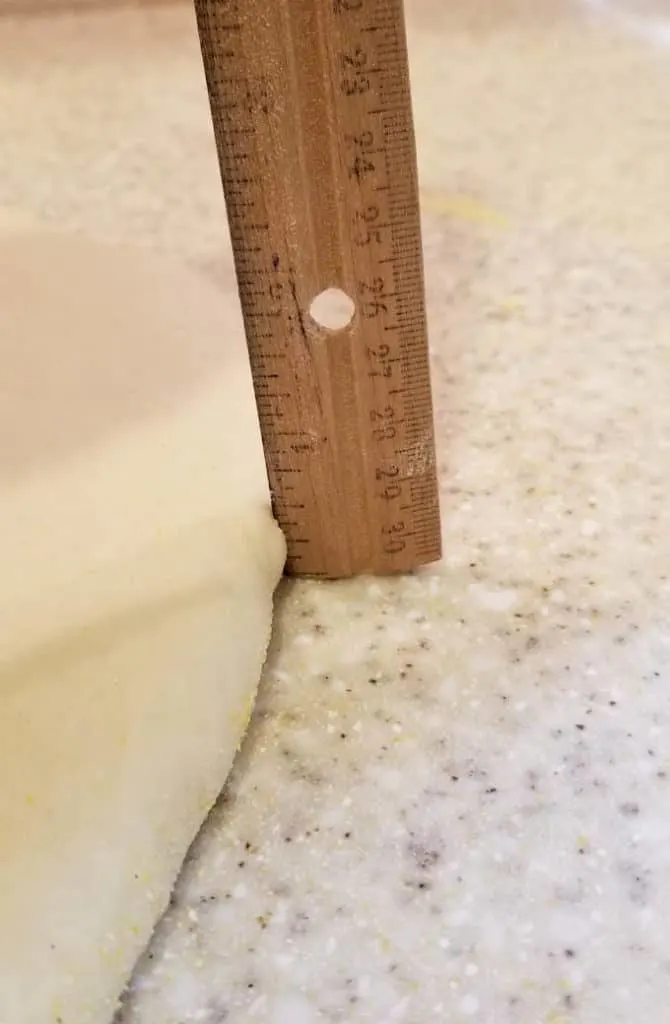
- Turn the dough from the bowl and knead briefly to form a smooth ball. Lightly sprinkle your work surface with cornmeal. Roll the dough to 1/2” thick. Cut muffins with a 3” biscuit cutter. Reroll the scraps and continue cutting until all the dough is used. You should get about 16 muffins. Place the muffins on an ungreased baking sheet. Cover the pan and let the muffins rise until almost doubled in volume, about 1 hour.
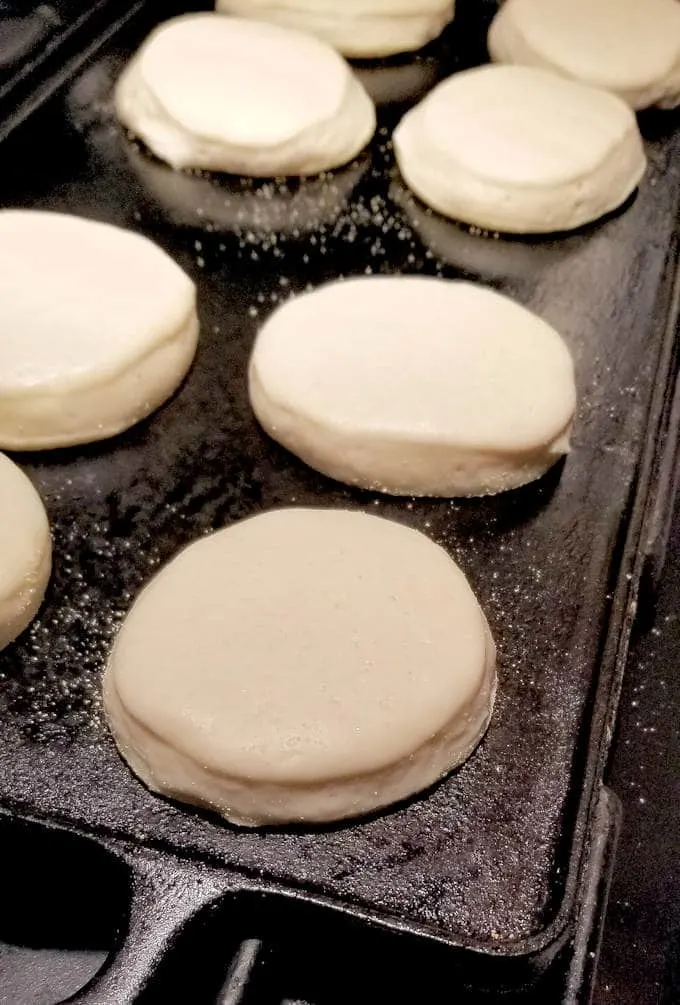
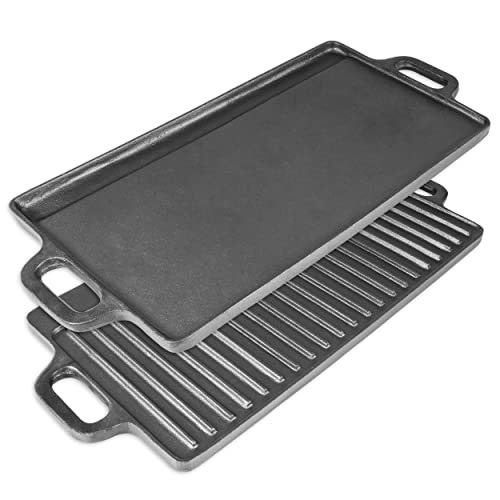
- Preheat a griddle or cast-iron pan over medium-high heat. Reduce the heat to medium-low and lightly oil the pan. "Bake" the muffins for about 8 minutes on each side until well-risen and deep golden brown. Keep an eye on the heat so the muffins don't burn. Adjust the heat as needed. Cool on wire rack. To serve, split and toast.
- The muffins freeze very well.


As an Amazon Associate and member of other affiliate programs, I earn from qualifying purchases.
I’m confused by the 25 oz / 5 cups of flour. I usually us 4.2 oz.
A cup of flour weighs 5 oz. If you’re weighing ingredients there’s no reason to worry about the volume measurements. They are included for folks who don’t have a kitchen scale to weigh ingredients.
Made these for the second time yesterday.. they are just delicious!!
Another great sourdough recipe. Followed all instructions but had to use a nonstick skillet and lid on medium low heat since I have a glass cooktop. Turned out perfect and delicious, thank you Eileen!
Could I make a loaf of bread from this recipe instead of muffins?
I’m sure you could, but I haven’t done it myself and couldn’t say exactly the type of pan to use and what the outcome would be. The distinctive taste and texture of an English Muffin is as much (or more) about how they’re “baked” than about the actual ingredients. Also, this is a big batch of dough so if you plan to bake in a loaf pan you probably want to make two loaves.
I made these with one-third whole wheat flour (by weight in grams) and they are good, the sourdough flavor really comes through! My dough was very sticky, though; I kept having to add a lot more regular flour to be able to work with the dough. I did an overnight stint in the frig after the first rise. I also had to cook them longer. But the end result was perfect. I like that this makes about 8 muffins, as I don’t need a larger batch! I split them using a fork and froze most.
@Marlene, oops this was not for this site/recipe! I was comparing it to another recipe I tried. I have made this muffin recipe successfully with some whole wheat flour; I halved it and it came out really well. I am likely to use this recipe in the future.
Made these yesterday only my second sourdough recipe to make after several attempts creating a happy starter. I love to bake and cook and have been for 40+ years but I’m new to sourdough. I didn’t try cooking with my starter until it was 4 weeks old and I constantly saw a happy active starter. The recipe was easy to follow and the English muffins came out great! The first batch I cooked are a little dense inside I think due to too hot of a surface, I adjusted the heat where they could cook for about 8 minutes on each side without burning in a covered cast iron skillet. For my glasstop this was at about 1.8-2. I used flour sparingly to roll the dough out so it wouldn’t get cornmeal all mixed in with it and place count out muffins on a large sheet tray that I had dusted with corn meal. They turned out beautiful and taste delicious I am hooked! Thank you for sharing the recipe !
I have a electric griddle what would be a good temperature to set it at & can the English muffins be baked in the oven
Thank you
Holley .
I’d start at 350 with the electric griddle and adjust from there. I don’t like to bake the muffins because the intense bottom heat of the griddle gives the muffins the characteristic browned bottom and quick rise. Since the sides aren’t baking as fast as the bottom the muffins have a big “spring” and the sides stay pale and soft.
The best! Mind you I’m on Turks and Caicos’s. But the last recipe I tried was so dense it was not eatable. These are amazing!!!
Recipe was confusing, in the write up it said 1/2 inch thick to roll it out to, but in actual recipe said 3/8” thick.
The inside did not cook and was still doughy so I had to bake, still currently baking and hoping they don’t burn at this point.
Thanks for pointing out the discrepancy. I’ve edited the recipe to 1/2″. But I don’t think the difference of an 1/8″ inch between the two descriptions would make a difference to how the muffins cook. Honestly, that number can’t be really exact and is a guideline. Perhaps your pan was too hot so the insides of the muffins didn’t have time to cook before the outside was done.
Thank you for this recipe. I am brand new to sourdough baking. I chose this recipe because of the easy to follow instructions and the ingredients. (some other recipes I’ve seen call for dry milk and I don’t have things like that around…). I really like the end result and will be making these again! I don’t have a biscuit cutter so I just cut them in squares (as I saw a video of a bakery doing that so I figured it would all work out…and it did!) I’m vegan and used unsweetened almond milk. I also apparently was out of vegetable oil, so I used almond oil. I used a stand mixer. It was a sticky dough to me (as others also described) so I added an undetermined amount of flour to it (probably at least 4 TBSP) and crossed my fingers, hoping for beginner’s luck on the dough consistency. I did the 3 hours of fermentation and multiple folding/stretching/flipping, as directed. Then, I let it sit in the fridge til morning. I rolled it out, cut into squares and let sit for almost 2 hours. Then cooked on 2 nonstick pans, lightly oiled. Found the heat to be difficult to gauge so I adjusted it a few times. My square muffins came out great (albeit huge!) and clearly will work perfectly for a sandwich too. This made 16 muffins for me. Both pans’ muffins cooked all the way through. I experimented and in the first batch, I used a lid on one of the pans, and not on the other. I think the lid option worked better so for my 2nd round of cooking on the stovetop, I covered both pans. I think it all turned out just great for my first time. Thank you for this easy to follow recipe, and especially the “Tips” section. I look forward to making these again and your bagels next!
Nice adaptation! This is why I always say baking is both an art and a science.
@Eileen Gray, Thanks! I think this is a wonderful recipe, and it speaks a lot to the technique and experience you put into communicating it to the world…based on my outcome as a total beginner! So, thank you heartily! Five star review!
I do not own a griddle or a cast iron skillet. Would a regular nonstick skillet work?
You can use any skillet, but you do want it fairly hot. Just be careful with non-stick since you don’t want it to get super-hot, above 500F.
these are amazing; highly recommend!
These are wonderful, I have made two batches in three days!
When I made the first batch they were ready around supper time, we ate three each and skipped the planned supper, it was going to be warmed up pizza made with your crust recipe the day before.
I have been looking through a lot of English muffin recipes and I noticed that the fermentation and rise times differ a lot. Yours was the only one that had the folding technique every hour or so. I was wondering what was the reasoning for this? I’m getting more into bread making and dont know the science behind everything yet.
@Devin Lewis,
Stretching and folding is the way the glutens are sort of “beaten” to become more digestible and the dough more airy to create those wonderful nooks and crannies in English muffins and typical SD breads. If you just kneed it and let it go, the end result in bread is more consistently dense. still okay, but not what most sourdough breads are like.
I made my 3rd batch of these this week. All of my family loves them! Your recipes are easy to follow. I’m anxious to try more. In fact, tomorrow I’m going to try the sourdough hamburger buns.
man oh man, did I make a mess of these… mostly self prescribed recipe modifications of self sabotage. Dealing with wet sticky dough, oof dah, may have found a limit to my capapbilities
Why not autolyse the 5 cups of flour instead of just 2?
Can we just chuck the stuff in a bread maker set to dough and let it rip?
Why the all purpose flour and not bread flour?
Is gluten formation important for muffins?
These look delicious! Wondering if you have to use cornmeal or if there is something I can substitute since my wife has a sensitivity to corn? Thanks!
Yes, semolina would work or just use more flour.
When you say, in quotation marks, to “BAKE” the muffins, does that mean put the muffins on a griddle on top of the stove, or bake them in the oven? If in the oven, at what temperature. The quotation “BAKE” direction has me completely confused
Yes, I put “bake” in quotes because they are not actually going into the oven but on the griddle. The word “cook” just seemed wrong too.
Choose this recipe from a bunch On the Internet because of all the additional information and the photos. These English muffins could not have turned out better. This is a recipe that I’m going to use again thank you so much. Would you please let me know if you have an Instagram account I would like to tag it in the photos of my English muffins which are definitely not pro but I really would like to add that information to my Instagram post thank you so much
Thanks, Michele. I’m glad you appreciate the extra information and photos. I think of my website as a place to teach so I give as much information as possible. I do have an Instagram account, @eileen.bakingsense
My dough is very very sticky too. I used 100% hydration starter…. it was very active and passed the float test. I used King Arthur Flour AP flour. I added alot more flour just to be able to get it out of my stand mixer. It never cleaned the sides of the bowl. I measured everything exactly as written In the recipe, using my scale. I’ve made many many successful loaves of sourdough bread. Any idea why I needed more flour?
It could be the result of older/newer flour, when it was milled, etc. I feel like when I mill my own flour it needs more water or exactly what the recipe calls for, or it may be a bit dry. I only know this as I used to withhold about 10 g per loaf of bread when using store bought.
Same, I replaced half the oil with butter, and the dough wasn’t sticky this time, could have been the butter, or could have been a better batch of flour. (also using KA Flour).
I’m about done with the 3 hour fermentation, and since I write my own food blog and follow several others, I wanted to give you kudos on how clear and concise your directions are. I’ve followed several other bloggers that don’t write out the instructions as well as you. Thank you so much!
Thanks!
Hi Eileen,
I just made a half batch, and the flavor is amazing! The only problem that I’ve been having is that my muffins come out a bit dense/doughy in the middle. I gave them an extra hour to rise before “baking,” and then only “baked” on low heat. I also use a 100% hydration starter. Can ou give me some other pointers as to where I might be going wrong?
If you eat them without toasting they will be a bit doughy tasting. I always toast my English muffins, even if they’re freshly made. Also make sure you’re rolling the dough thin enough. You can always roll it a bit thinner if you prefer.
Have you tried freezing the muffins before the final rise? If I wanted to make the dough and shape them would I be able to freeze them and still have them rise as they thaw right before goi g on the skillet??
I have found that my sourdoughs don’t do that well when frozen. When I make these English muffins I “bake” the entire batch then freeze the leftovers. Since I always toast English Muffins I just microwave the frozen muffin for a few seconds so I can split them, then toast.
I’ve made these several times; they’re so easy and my husband loves them. After the first try, I no longer used cornmeal to roll them out, cornmeal gets into the “scraps”. I sprinkle the cornmeal on the tray for the rise. Also they seem to shrink in the freezer so I use a slightly larger cutter. They come out picture perfect. My husband wanted whole wheat, and without thinking, I used 100% ww. The starter was strong enough to make a perfect batter, though I used a tiny bit more liquid and honey. Because they’re denser, they need to be cooked a minute or two longer per side. They were delicious with that slight nutty flavor. Thanks for the recipe.
Good to know that all ww flour works. Thanks for the tips.
Wow! I’m in the middle of my first batch of these English muffins and they are delicious! They turned out so big and fluffy! They didn’t really double in size after I cut them, but when I was cooking them in my cast iron pan, they got noticeably bigger! I just devoured one.! Holding myself back or they will all disappear! The recipe actually yielded about 40 because I like mine smaller. I froze half of the dough and I’ll make the rest next week. Thanks so much for this great recipe. I’m looking forward to trying more of your sourdough starter recipes.
I cooked the muffins, and had trouble gauging the correct heat. I don’t have a cast iron griddle. I used a non stick square griddle that is probably too thin. Finally figured out the right heat and timing for my last 4 muffins. The 8 minutes seems like a long time, but at the medium low heat setting the muffins won’t scorch while they rise and heat up (bake) in the center. All in all, they taste much better than store bought and this is an easy recipe to follow and worth the effort. I will try again using a larger cutter because I got too many muffins..
I had the same experience as the other bakers that said the dough was very sticky. Even during the “fold” stages I had to wet my hands in order to stretch the dough and fold over. I oiled my bowl and it still wanted to stick. The rise was not a problem at all. It rose between folds nicely. Once I had to knead , it was impossible not to use a bit of flour to be able to get it to release from my hands and my dough board. It also wanted to spring back and was difficult to roll out. I gave it an extra hour. During cutting it wanted to stick to my cutter and my parchment paper. Just a very sticky dough. I got almost 30 muffins cut out. I’m hoping they expand larger than a 3″ muffin. Hopefully with more experience, a few more tries this will come together. I will post my results once I have cooked them.
Would love to have nutrition info especially Calories, carbs, fats, & protein.
Hi there, I’ve loved every one of your sourdough recipes that I’ve tried and am currently trying this English muffin one – I unfortunately don’t have cornmeal, can I substitute semolina?
Yes, that should work.
Can you make these without a stand mixer? Can I mix by hand?
You can. But it is a somewhat sticky dough so is a little more difficult than a stiff bread dough. Keep your hands and the surface floured. You’ll also get gluten development during the fermentation phase, thanks to the folding.
I keep a smaller starter and save my discard in the fridge. When I have half the needed amount of starter I mix with flour and water to get the right volume. Wait a couple of hours and its ready. These always turn out beautifully. I might have to try the cinnamon raisin version next time.
Hi! 🙂
THANK YOU so much for this recipe! I started by making just half of the recipe to check it out, It was a TOTAL SUCCESS! Had it with loads of butter an my homemade strawberry jam. I am already making the whole recipe now.
The only thing I changed was that I weighed the entire dough and divided it into the pieces you suggested, in my first case they were 8. Then I proceeded to shape each one as I do with Arepas, about 4″ When they were cold, I cut them all in half with a fork and froze them. Now all we have to do is place the halves in the toaster and voià, the best breakfast!.
Carmen
Barcelona, Spain
These are da bomb!! I’ve used other recipes and they’re good but yours are Grrrreat!! I usually make a sponge overnight then add the rest of the flour. Your method comes out with a lighter muffin with more rise! I did use all milk, not milk and water. Also added cinnamon and raisins to half the batch. I cook them stovetop in cast iron skillets with covers, 275° for 3-4 minutes per side. Perfect!! I am loving your sourdough recipes!! They make sense. Thank you! Blessings.
I just made these with cinnamon raisin last week. So good.
@Eileen Gray, me too! I love this recipe straight up or cinnamon raisin!
I made your recipe for pita bread yesterday. And just started the fermentation for the english muffins. Very inexperienced baker here! My question is, how long should it take to clear the sides of the bowl and wrap around the dough hook? It happened very quickly with both doughs. Doesn’t seem like much kneading. This recipe said to knead it 2-3 minutes though so I let it keep going. It stuck to the sides and got very sticky. Hoping it comes together better during fermentation. Btw, the pita bread turned out great! Not nearly as pretty as yours, but still good. Looking forward to homemade english muffins!
Just knead for the time listed and don’t worry about it. Most of the magic happens during the fermentation. If you made the pita bread you already know how the dough changes during long fermentation.
Hello!!
I just tried this recipe (they are in the final rise, but I am wondering if I did something wrong. My dough was huge! I shaped 16 muffins with a 3inch cutter and still have more than half the dough left?? Also every time I would roll out the dough to 3/8in it was just puffing up again no matter how much i rolled it out – its not a bad thing cause now i have over 30 muffins, but has this ever happened to you?
By “puffing up..no matter how much I rolled out” do you mean it was springing back so the tall was thicker? That’s no so unusual for a bread dough. You will get more muffins if you roll the dough thinner. How did they end up? For me, these muffins tend to spread a bit while they are rising and then puff up again on the griddle.
Yes that is what i mean it kept springing back! (not the most experienced baker) They turned out great they doubled in size after the final rise and cooked well! I put the rest of the dough in the fridge over night and i am going to cook those today so I can compare the flavor! I’m wondering if the cold dough will be easier to roll out. Love the recipe! Thanks for the reply!
The cold dough will probably be easier to roll out because it will have time to relax. The gluten in the dough is like a muscle, it gets tight and need to relax to loosen up.
Do you have any idea how this might work with gluten free bread flour?
I’m sorry, I don’t have experience with gluten free bread flour. I would think if it works for regular bread it should work for this recipe. But I can’t say for sure.
My dough came out super sticky and loose.the gluten was developed but it was very flabby. When I shaped the muffins they kind of deflated and sagged over. I’ll still “bake” them, but what’d I do wrong? I even did an extra fold as well as some twist and coils. Did it just need more flour (I went by weight not volume)
Thanks!
Is your starter a 100% hydration starter?
Yes it is.
The only think I can think is the ap flour I have may be as low as 9 or 10% protein. It was a Costco size bag and the company website says their ap flour ranges from 9.5% to 11.5%
It could be the flour. Is the flour bleached or unbleached? That can also make a difference. This should definitely not be a “flabby” dough. They will spread out more than up but usually will puff up nicely on the griddle.
It is bleached (who can say not to 50lbs flour for $35!).
They ended up puffing nicely on the griddle despite flattening during the transfer to the heat.
They tasted great, just tasted a bit dense. Would you recommend adding more flour next time all things considered?
Thanks so much for taking the time to answer!
My husband requested these be made with my next-to-new starter. Shortly after making the dough I realized my starter had been too wet, my dough was gooey even after using more flour. I was so frustrated I just left the dough covered on the counter overnight. The next morning my whole kitchen smelled strongly of sourdough and the dough had risen beautifully, but not enough to roll out. I divided the dough in half by scooping it out onto two pieces of parchment and dropped them (one at a time) straight into my preheated dutch oven… the result was two super flavorful, perfectly textured bread loaves that I’m about to toast up for BLT’S. Guys, if this doesn’t work out for you the first time don’t give up! You’ll still get something tasty you can use and you’ll learn something new for next time (like making sure your starter is equal weights flour, water, and primordial goo before starting a recipe that requires it to be at 100% hydration).
Ha, ha. Love your flexibility and “get the job done” attitude. When life gives you goo…..
I halved the recipe but for some reason my dough was super dense and kinda all in big separate chunks after mixing, is this normal? I added more milk to to make it a litttle more cohesive. It made it more cohesive and smoother as I continued to need it. But not sure if this will turn out… did anyone else have dense dough? Everyone else’s seemed sticky.
So much of sourdough baking is dependent on the starter. If your starter is dense the dough will be dense.
This is a fantastic recipe! Thank you so much for sharing.
I’m busily building the dough for my third batch of these beauties! I freeze most from each batch, but my husband loves them so much they aren’t letting sting long even in the freezer!
Lol
So glad you like them!
These have the perfect English muffin flavor. Great texture, too. Will be making these muffins in the future!
Is it possible to bake the English muffins? I don’t have a large griddle pan. TY
You could but without the direct bottom heat they’ll probably rise and bake a bit differently. You can also bake a couple at a time in a cast iron skillet. If you do have to bake them I would preheat the baking pan so that when you place the muffins on the pan they get a direct hit of bottom heat.
These turned out perfect. I used 100% whole grain kamut flour, 1 less cup than called for. I also completely forgot the milk! They are absolutely delicious!
Anyone try the float test to know when things are properly fermented? With a other bagel recipe the test of if they were ready was if the dough floated in cold water.
I made these and I’m really pleased how they turned out. Thank you. However your metric measurement for water is not correct. 3/4 cup is not 184mL it is 150mL or 150 grams. Because of this i used too much water and my dough was very wet. I added more flour and saved the muffins. I don’t know if the other metric measurements are correct but it’s worth a look.
Hi. 3/4 of a cup of water is 6 oz. I use the conversion of 30 ml per ounce. So 6 oz of water is 180ml. No sure which “cup” measure you are referring to.
Any idea why the biscuits haven’t doubled in volume after cutting, I’ve waited an hour. Everything else has gone beautifully until this point.
Thanks!
Hi Becca. Did you chill the dough or has it been left at room temp? Listed times for sourdough recipes are always variable. The time can vary based on the temp of the dough, the temp of the room and how active the starter was.
I chilled the dough overnight. Before rolling and cutting I took it out of the fridge for 2 hours. It’s now had 2 hours to rise and still very little change. Thanks!
Once the dough is chilled it does slow down. What I do if the dough is very cold is try to find a warm spot for it. I’ll often turn the oven on very, very briefly just to warm it to about 80 degrees then turn it off. Place the tray with the muffins in the oven. Once the dough warms up it will become active again.
Thank you Eileen, I’ll try that!
My starter is NOT equal weights hydration – it’s the King Arthur version, so half as much water as flour added to feed.
I think this is why a lot of my recipes are dense and the dough dry. How do I compensate for this?
Hi Jenn, You can use any hydration starter as long as you adjust the water and flour in the recipe for the difference. In my recipes I always use 8 oz of starter. Since my starter is 100% hydration that means the 8 oz of starter adds 4 oz of water and 4 oz of flour to the recipe. So if your starter is half as much water as flour (by weight?) then if you use 6 oz of starter that would mean you’re adding 4 oz of flour and 2 oz of water. So you can use my recipe but will need to add 2 oz of water to the dough to compensate for the lower hydration starter. Hope that helps.
I am currently cooking my muffins. I am noticing they are spreading out instead of rising. I followed directions exactly.
The ingredients was a little confusing. I divided the 500 g of flour by 5 so I can add the 2 cups like stated. But I noticed when i used my measuring cup 240g was not 2 cups it was less. So should we measure out by weight or a measuring cup?
Also I noticed they brown faster than the insides cooked. I have my stove on low and the skillet is covered.
Measure either by volume (cup) or weight. No need to do both. Weight is always the most exact. I just provide volume, metric and US measures so everyone can measure the way that works best for them. If they’re browning too fast you’ll need to lower the heat. I don’t cover the pan while they’re cooking. That could be why they’re getting too hot.
Does the starter need to be active? I’ve got loads of discard in the fridge that I want to use up but it’s unfed.
Hi Selina. Yes, the starter should be active. If you use discard that hasn’t been fed the dough will be sluggish and you won’t get enough lift to for the open crumb. I have a whole collection of recipes that use sourdough discard. If you’re a chocoholic I highly recommend the brownies.
Can you use 2% milk in this recipe
Yes.
I have tried 3 or 4 different recipes for sourdough, including this one, and for every one of them the dough I am being left with is ridiculously soft- unkneadable without substantial extra flour. Am I doing something wrong?
A lot of sourdough recipes create a dough that is significantly wetter than typical “yeasted” bread dough. It does take some getting used to. Also, make sure your starter is the same hydration as the recipe specifies. I use a 100% hydration starter (fed equal weights of starter-water-flour). If your starter is wetter than your dough will be wetter.
Hi! I’m new to sourdough and have only made sourdough focaccia so far but this is my next step. I have half and half in the fridge and am avoiding the store because of the current pandemic, would that work or should I cut it with a little water?
Yes, that should be fine. I would say half 1/2&1/2 and half water would work.
Hello! I was so excited to find your recipe! However, my dough won’t form into a ball. I’m not sure what to do. I did everything as stated so far. Except testing a bit of sour dough starter in liquid before starting! ♀️ Didn’t see that until I had everything mixed. Can you help?? I’ve added four 1/4 cups of flour after the 5 cups the recipe called for. Like you do when the dough ain’t setting up. So I’m up to 6 cups of flour total. I wish I could post a picture so you could see. I don’t know how to proceed.
Isn’t not ain’t ♀️
Are you using a stand mixer? Are you using a 100% hydration starter (equal weights starter-water-flour) With sourdough, even if the dough is quite sticky to start, after several hours of fermentation the dough should come together. I would stop adding flour and set it aside to rise. I see that this comment is from last night. How did it work out?
Hi Eileen,
I was looking for recipes that I can use for my sourdough starter. I just discovered your article, you’re my saving grace! I would like to ask if I can divide the recipes into half? I only have a bread maker and I am planning to use it just to mix the dough. I don’t think it can handle 5 cups of flour plus other ingredients.
Thanks,
Ann
Yes, you can always halve the recipe.
I followed the recipe exactly and they didn’t rise at all. The dough looked like yours and felt how I imagined it should but they never rose and then when I cooked them they remained completely flat. I’m pretty sure I’ll never attempt english muffins again. Way too time consuming for tiny glorified pizza crusts. If they didnt have the sweetness from the honey I could salvage them for pizzas but in the trash they go instead. And an entire day wasted. I could cry.
Can I answer a question for you?
Any idea why this happened? Or a way to fix it if I decide to try again? Do I have to use a sweetener at all? I’d prefer no sweetener.
they
????
Made these tonight to switch it up from the usual sourdough loaf… and I’m hooked. The husband already sampled and says if I want them to last, I should hide them from the kids. Haha. Thank you!
Hi there! For kiddos with a dairy allergy, is the whole milk necessary, or can a non dairy milk be swapped in?
Hi Taylor. Do you mean using something like almond milk? That should work just fine. You could probably even use water in place of the milk. The flavor will be a little different, but it will work.
Hi Eileen! I’m from Argentina and just a few weeks ago I dived head first into the sourdough world. I came across your blog and every recipe looks amazing, can’t wait to try each and every single one. The weather is super hot here this time of the year, so some of them might have to wait. Thank you for sharing your recipes and tips!
Have Fun!
Can these be baked in the oven instead of the griddle or stovetop method?
Can the dough be mixed and rise in a bread machine on the dough setting!? I’ve made English muffins before like that but haven’t added sourdough yet.
I don’t have experience with a bread maker, but I don’t see why it wouldn’t work. Can you get into the machine to turn the dough while it’s fermenting?
I bake them for 15-20 minutes at 375F, to an internal temperature of 205F.
Does anyone else find that the dough turns to a sticky mess after the flour is all added? This is my second recipe and I was hoping that it wouldn’t happen again. I add all the flour, it looks great, then suddenly liquifies! Do I add more flour until it becomes a lovely dough ball or do I suck it up and hope for the best?
I’ve never had the dough come together and then “liquify”. Do you mix the dough by hand or with a stand mixer? Did you allow the sponge the 30 minute rest as instructed in step #1? That gives the gluten a head start. If working on a mixer the dough should cling to the hook and clear the sides of the bowl (it will stick to the bottom). If it’s not gathering on the hook you can sprinkle a little more flour, but give the mixer time to do bring the dough together on the hook. Sourdoughs will start out somewhat sticky (not so much a “dough ball”) but should become more elastic and cohesive during the long fermentation. Did you take the recipe through to the end or did you ditch the dough? Sourdough does behave a little differently than a regular dough so I would suggest you try finishing the recipe. Let me know if you have any other questions.
Can you use olive oil?
I had the same issue. I bake sourdough bread at home with great results and was excited to try this recipe. One thing i noticed is that it calls for 5 cups or 700 grams of flour. 5 cups is 600 grams so that could be the issue? I’m not sure but it was definitely much “wetter” than any sourdough I’ve ever done
A cup of all purpose flour (using the dip and sweep method) weighs 5 oz. I use the conversion of 28 grams per ounce. So 5 cups of all purpose flour weighs 25 oz. 25ozx28=700g. If you use the spooning method for measuring flour or fluff it up before measuring your cup of flour will weigh less. All my recipes assume 5 oz per cup of flour.
This has turned into a favorite. I’d been looking for more things to do with my sourdough starter and this was perfect. It puts the store bought English muffins to absolute shame. I’ve started adding a spice mix of cinnamon, ginger, nutmeg, and cloves to the dough for “pumpkin spice” and it has turned out really well.
Sourdough baking is kind of addicting, isn’t it? Here’s a link to a list of all my sourdough recipes. Have fun!
Hi there,
I’d like to make these with 1/2 the amount of honey. I am aware that the sweetener contributes to “feeding” the natural yeasts as well as flavour, so could I compensate (for using only 1/8 cup of honey) by allowing a longer time to rise? (I make sourdough bread for my family on a regular basis so I’m familiar with the use of sourdough starter but I’m wondering if you can advise me regarding using 1/2 the honey….
Thanks so much
Sheila
Yes, you can reduce the honey. The rise time is pretty variable anyway, as you know if you’re used to working with sourdough. Also, you may want to hold back a little of the flour as the honey also provides moisture. Just out of curiosity, why are you reducing the honey? Do you think they might be too sweet or do you just prefer less sugar in general.
Hi, made these twice now. First time a tad dense but toasted up well. 2nd time I increased the first rest to one hour, mixed and folded as directed, then proofed overnight in the fridge. Rolled out, cut and let rise one hour in 100 degree oven.
Nice rise and better density, but still a little dense. Great taste though. The overnight proof really let’s the sourdough taste develop.
Yes, the long rise is the key. As you know, when working with sourdough you have to be flexible on the timing. I’ve found that in a cool kitchen with cool dough the entire process can slow down.
Toasted up very nice this morning. Texture was fine.
where can I see the video. This page has a chocolate genoise video on it
Hi Lisa, there is no video for this recipe. You can look at the process photos to see the step by step process. If you have any specific questions I’d be happy to answer them for you.
Love this recipe. My English muffins turned out great. I might make them a little smaller next time.
Sure, adapt the recipe to your own taste!
The muffins turned out wonderful as well..thease recipe’s are amazing… anyone that’s not made them. …they should..
Thanks!!
Hello Eileen, I am a big fan of your bakes and this is a wonderful recipe. The pictures stole my heart away. Such lovely colours and a beautiful crumb. Simply superb!
Awww, thanks so much Namita! I’m a fan of your blog too. You have lovely photos and a very evocative writing style.